Introduction
In this tutorial, we'll walk through fetching token balances for a Smart Contract Wallet using the Fusebox Web SDK in a Next.js application. We'll utilize React hooks to manage the State and display the token balances in a table format.
Prerequisites
Before starting, ensure you have the following:
- Node.js installed on your machine.
- Code Editor: Use your preferred code editor; VS Code is recommended.
- An EOA wallet with a private key. You can use an existing one or create a new wallet.
- A basic understanding of React.js and Next.js.
- An API key from the Fuse Console. Get one here.
Step 1: Set Up a Next.js Project
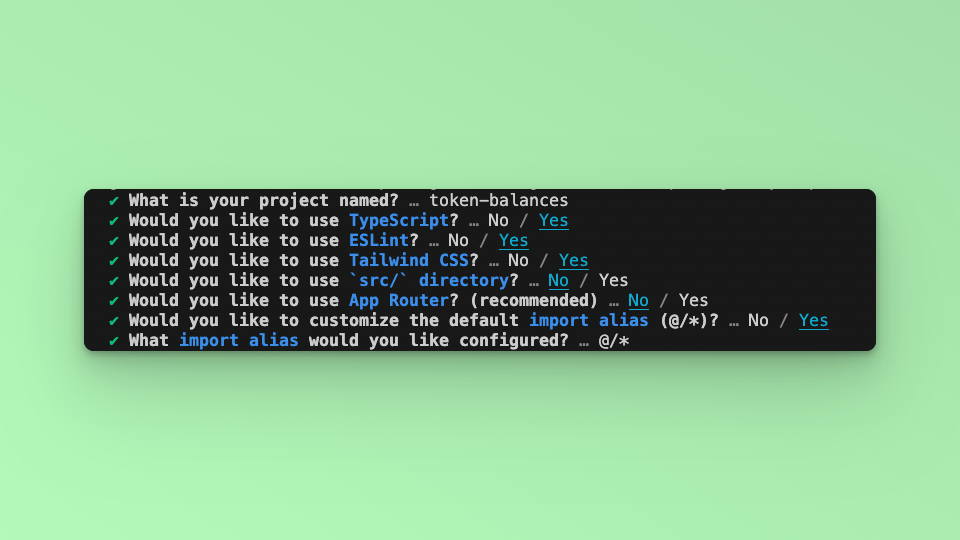
If you haven't already set up a Next.js project, you can create one using the following commands:
npx create-next-app my-project
cd my-project
Answer the required prompts from NextJS in the terminal. We must note that we use TypeScript and Tailwind CSS for this application.
Step 2: Install Required Packages
Install the necessary packages by running the following command in your project directory:
npm install @fuseio/fusebox-web-sdk ethers
Step 3: Implement the Code
Replace the contents of pages/index.js with the following code:
// pages/index.js
import { Inter } from "next/font/google";
const inter = Inter({ subsets: ["latin"] });

import { FuseSDK } from "@fuseio/fusebox-web-sdk";
import { ethers } from "ethers";
import { useState, useEffect } from 'react'

export default function Home() {
  const [smartAccount, setSmartAccount] = useState<string>("")
  const [tokenNames, setTokenNames] = useState([])
  const [balances, setBalances] = useState({});

  const smartWallet = async () => {
    const apiKey = "YOUR_API_KEY"; // Replace with your API key
    const credentials = new ethers.Wallet(`YOUR_PRIVATE_KEY`); // Replace with your private key
    const fuseSDK = await FuseSDK.init(apiKey, credentials, {
      withPaymaster: true,
    });

    setSmartAccount(fuseSDK.wallet.getSender());

    const tokenList = await fuseSDK.explorerModule.getTokenList(smartAccount);
    setTokenNames(tokenList);

    const tokenAddresses = tokenList.map((x) => x.address);

    const fetchedBalances = {};

    for (const tokenAddress of tokenAddresses) {
      const balance = await fuseSDK.explorerModule.getTokenBalance(tokenAddress, smartAccount);
      fetchedBalances[tokenAddress] = balance;
    }

    setBalances(fetchedBalances);
  };

  useEffect(() => {
    smartWallet();
  }, []);

  return (
    <main className={`flex flex-col items-center p-24 ${inter.className}`}>
      <h1>Hello, World!</h1>
      <p>Smart Account Address: {smartAccount}</p>
      <div className="relative overflow-x-auto shadow-md sm:rounded-lg mt-12">
        <table className="w-full text-sm text-left rtl:text-right text-gray-500 dark:text-gray-400">
          <thead className="text-xs text-gray-700 uppercase dark:text-gray-400">
            <tr>
              <th scope="col" className="px-6 py-3 bg-gray-50 dark:bg-gray-800">Token Name</th>
              <th scope="col" className="px-6 py-3">Token Address</th>
              <th scope="col" className="px-6 py-3 bg-gray-50 dark:bg-gray-800">Amount</th>
            </tr>
          </thead>
          <tbody>
            {tokenNames.map((token, index) => (
              <tr key={index}>
                <td>{token.name}</td>
                <td>{Object.keys(balances)[index]}</td>
                <td>{Object.values(balances)[index].toString()}</td>
              </tr>
            ))}
          </tbody>
        </table>
      </div>
    </main>
  );
}
Replace "YOUR_API_KEY" and "YOUR_PRIVATE_KEY" with your actual API key and private key.
Step 4: Run Your Next.js Application
Run your Next.js application using the following command:
npm run dev
Visit http://localhost:3000 in your browser to see the application in action. You should see a table displaying the token names, addresses, and amounts associated with the Smart Contract Wallet.
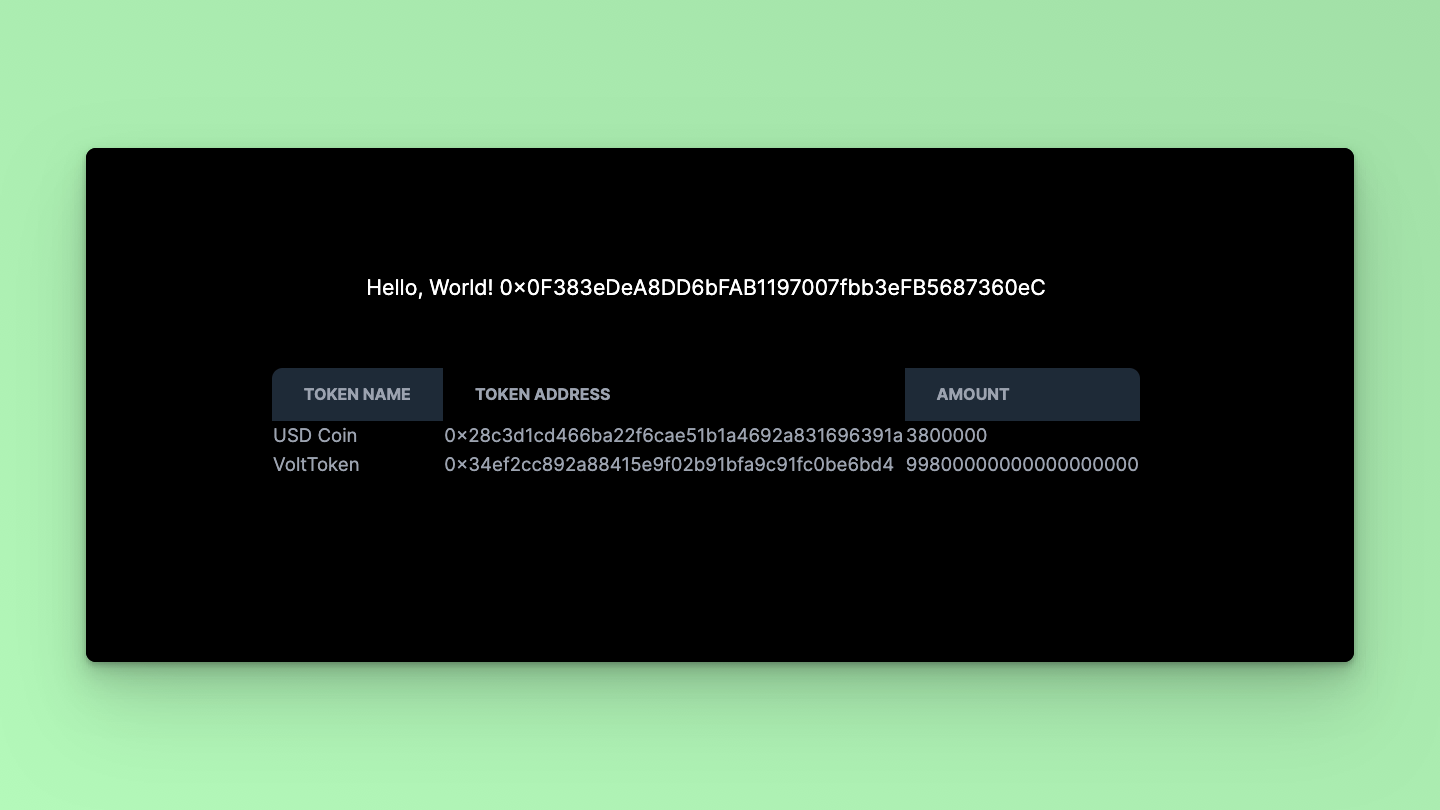
That's it! Using the Fusebox Web SDK, you've successfully fetched and displayed token balances for a Smart Contract Wallet in a Next.js application. You can further customize the UI or add additional features per your requirements.
Step 5: Code breakdown
Let's break down the smartWallet function and explain the usage of the getTokenList and getTokenBalance methods:
const smartWallet = async () => {
  // Initialize FuseSDK with API key and credentials
  const apiKey = "YOUR_API_KEY"; // Replace with your API key
  const credentials = new ethers.Wallet(`YOUR_PRIVATE_KEY`); // Replace with your private key
  const fuseSDK = await FuseSDK.init(apiKey, credentials, {
    withPaymaster: true,
  });

  // Get the Smart Account Address
  setSmartAccount(fuseSDK.wallet.getSender());

  // Get the list of tokens held by the Smart Contract Wallet
  const tokenList = await fuseSDK.explorerModule.getTokenList(smartAccount);
  setTokenNames(tokenList);

  // Extract token addresses from the token list
  const tokenAddresses = tokenList.map((x) => x.address);

  // Fetch balances for each token
  const fetchedBalances = {};

  for (const tokenAddress of tokenAddresses) {
    // Get the balance for the current token
    const balance = await fuseSDK.explorerModule.getTokenBalance(tokenAddress, smartAccount);
    // Store the balance in the fetchedBalances object with tokenAddress as key
    fetchedBalances[tokenAddress] = balance;
  }

  // Update the balances state with the fetched balances
  setBalances(fetchedBalances);
};
Now let's explain each part of the smartWallet function:
Initialization:
- We initialize the FuseSDK using the provided API key and credentials using
FuseSDK.init(). - The
withPaymaster: trueoption enables the use of a paymaster.
- We initialize the FuseSDK using the provided API key and credentials using
Getting Smart Account Address:
- We retrieve the address of the Smart Account using
fuseSDK.wallet.getSender()and set it to thesmartAccountstate variable.
- We retrieve the address of the Smart Account using
Getting Token List:
- We use
fuseSDK.explorerModule.getTokenList(smartAccount)to fetch the list of tokens held by the Smart Contract Wallet. - This method returns an array of objects, each containing information about a token, such as symbol, name, and address.
- We set this array of token objects to the
tokenNamesstate variable.
- We use
Extracting Token Addresses:
- We extract the token addresses from the
tokenListarray using themap()function and store them in thetokenAddressesarray.
- We extract the token addresses from the
Fetching Balances:
- We initialize an empty object,
fetchedBalances, to store the token balances. - We iterate over each
tokenAddressin thetokenAddressesarray. - For each
tokenAddress, we usefuseSDK.explorerModule.getTokenBalance(tokenAddress, smartAccount)to fetch the balance of that token held by the Smart Contract Wallet. - We store each balance in the
fetchedBalancesobject with thetokenAddressas the key.
- We initialize an empty object,
Updating State:
- Finally, we update the
balancesstate variable with thefetchedBalancesobject containing token balances.
- Finally, we update the
This breakdown explains how each part of the smartWallet function works and utilizes the getTokenList and getTokenBalance methods to fetch token information and balances for a Smart Contract Wallet.